在开始之前也是老套路为啥要集成websocket呢?肯定是有需求就会有市场,现在的项目中都会有消息提醒的机制,比如某个人审批了,另一个人要能实时接收到通知,再比如手机上app的消息推送等,这些需求呢传统的方式也可以实现比如写轮询服务器某个接口代码,每隔多少秒查询一次,也可以做到消息提醒和在线聊天的功能,但是这种方式就有很大的弊端,一个是对服务器的压力,一个是消息的不及时,为了弥补这些不足呢,制定通信协议标准的大佬们就制定了websocket通信协议,这个协议呢就可以弥补之前说的这些不足而且也很方便的实现数据交换,是一个全双工协议,客户端和服务端就像两个人说话那样实时,是一个长连接协议,好了开始集成吧!
对于websocket不是很清楚的小伙伴可以网上找找资料,这里继续接着上次的项目集成websocket,这次会做的全面一点,包括通信页面,页面用的vue+elementui的前端框架,在前后端分离的大趋势下我们都是用主流的技术,所以不会再用操作dom或者jquery的这种老方法,只不过这里为了简单点,前端页面跟项目做到了一起,也就是在springBoot集成thymeleaf模板渲染我们的静态页面,正常的话都是webpack模式开发然后nginx部署,有兴趣的话,后面有时间也可以讲讲纯前后端分离的开发模式,当然我前端技术也还可以。
目录
1、项目中集成websocket和thymeleaf依赖
这里还集成了热部署,因为有静态页面需要频繁更改手动重启不方便,集成它帮我们自动更新
<!-- websocket集成 -->
        <dependency>
            <groupId>org.springframework.boot</groupId>
            <artifactId>spring-boot-starter-websocket</artifactId>
        </dependency>
        <!-- thymeleaf模板解析集成 -->
        <dependency>
            <groupId>org.springframework.boot</groupId>
            <artifactId>spring-boot-starter-thymeleaf</artifactId>
        </dependency>
        <!-- 添加热部署 -->
        <dependency>
            <groupId>org.springframework.boot</groupId>
            <artifactId>spring-boot-devtools</artifactId>
            <optional>true</optional>
            <scope>true</scope>
        </dependency>
2、 新建websocket配置类
在config包下新建WebSocketConfig
相当于启用websocket端点支持
package com.apgblogs.springbootstudy.config;

import org.springframework.context.annotation.Bean;
import org.springframework.context.annotation.Configuration;
import org.springframework.web.socket.server.standard.ServerEndpointExporter;

/**
 * @author xiaomianyang
 * @description
 * @date 2019-07-07 10:34
 */
@Configuration
public class WebSocketConfig{

    @Bean
    public ServerEndpointExporter serverEndpointExporter(){
        return new ServerEndpointExporter();
    }
}
3、新建websocket业务实现类
这里就是核心了,所有连接的打开关闭等都会在 这里进行处理
这里需要注意的一点,因为我们之前集成了oauth2所以后台没有session,只有一个access_token,websocket获取当前用户名取得是session里面的,但是我们没有session,所以可以考虑查询oauth2表,用token查找对应的用户名,也可以在令牌生成时将用户名放到缓存里面,这一块我这里没有做,但是实现起来也不复杂,可以自己尝试一下,有更好的方案欢迎分享,查数据库肯定是下下策
在service包中新建WebSocketServiceImpl类
package com.apgblogs.springbootstudy.service;

import org.slf4j.Logger;
import org.slf4j.LoggerFactory;
import org.springframework.beans.factory.annotation.Autowired;
import org.springframework.security.oauth2.provider.token.TokenStore;
import org.springframework.stereotype.Service;

import javax.websocket.*;
import javax.websocket.server.ServerEndpoint;
import java.io.IOException;
import java.text.SimpleDateFormat;
import java.util.Date;
import java.util.concurrent.CopyOnWriteArraySet;

/**
 * @author xiaomianyang
 * @description
 * @date 2019-07-07 10:35
 */
@ServerEndpoint("/ws")
@Service
public class WebSocketServiceImpl {

    private final Logger logger= LoggerFactory.getLogger(WebSocketServiceImpl.class);

    private static int onlineCount=0;
    private static CopyOnWriteArraySet<WebSocketServiceImpl> webSocketSet = new CopyOnWriteArraySet<>();

    private Session session;

    private SimpleDateFormat simpleDateFormat = new SimpleDateFormat("yyyy-MM-dd HH:mm:ss");

    @OnOpen
    public void onOpen(Session session){
        this.setSession(session);
        webSocketSet.add(this);
        addOnlineCount();
        logger.info("新的连接加入,在线人数为:{}",getOnlineCount());
        try{
            sendMessage("新的连接加入,在线人数为:"+getOnlineCount());
        }catch (IOException e){
            logger.error("IO异常");
        }
    }

    @OnClose
    public void onClose(){
        webSocketSet.remove(this);
        subOnlineCount();
        logger.info("关闭了一个连接,当前在线人数",getOnlineCount());
    }

    /**
     * @description 接受消息时
     * @author xiaomianyang
     * @date 2019-07-07 12:27
     * @param [message, session]
     * @return void
     */
    @OnMessage
    public void onMessage(String message,Session session){
        logger.info("来自客户端消息:"+message);
        //将消息群发
        for(WebSocketServiceImpl webSocketService:webSocketSet){
            try{
                if(message.equals("好嗨哟!")) {
                    webSocketService.sendMessage(message);
                    webSocketService.sendMessage("感觉人生已经到达了巅峰");
                }else if(message.equals("宝宝,我爱你")){
                    webSocketService.sendMessage(message);
                    webSocketService.sendMessage("宝宝:我也爱你");
                }else{
                    webSocketService.sendMessage(message);
                }
            }catch (IOException e){
                e.printStackTrace();
            }
        }
    }

    /**
     * @description 错误时调用
     * @author xiaomianyang
     * @date 2019-07-07 12:26
     * @param [session, throwable]
     * @return void
     */
    @OnError
    public void onError(Session session,Throwable throwable){
        logger.info("发生错误");
        throwable.printStackTrace();
    }

    /**
     * @description 发送消息
     * @author xiaomianyang
     * @date 2019-07-07 10:41
     * @param [message]
     * @return void
     */
    private void sendMessage(String message)throws IOException {
        this.session.getBasicRemote().sendText(simpleDateFormat.format(new Date())+" "+message);
    }

    /**
     * @description 获取在线连接数
     * @author xiaomianyang
     * @date 2019-07-07 10:42
     * @param []
     * @return int
     */
    private static synchronized int getOnlineCount(){
        return onlineCount;
    }

    /**
     * @description 连接数增加
     * @author xiaomianyang
     * @date 2019-07-07 10:43
     * @param []
     * @return void
     */
    private static synchronized void addOnlineCount(){
        WebSocketServiceImpl.onlineCount++;
    }

    /**
     * @description 当连接人数减少时
     * @author xiaomianyang
     * @date 2019-07-07 10:44
     * @param []
     * @return void
     */
    private static synchronized void subOnlineCount(){
        WebSocketServiceImpl.onlineCount--;
    }

    public Session getSession() {
        return session;
    }

    public void setSession(Session session) {
        this.session = session;
    }
}
4、新建两个controller,一个做首页渲染用来获取access_token,一个获取websocket页面
在controller包下建立两个controller类
IndexController,主要是访问首页,因为我们要获取token,所以单独弄一个controller用来渲染首页静态页面
注意这里的注解用的时controller,而不是restController,因为restController返回的是json串并不会渲染视图
package com.apgblogs.springbootstudy.controller;

import org.springframework.stereotype.Controller;
import org.springframework.web.bind.annotation.GetMapping;

/**
 * @author xiaomianyang
 * @description
 * @date 2019-07-08 12:00
 */
@Controller
public class IndexController {

    /**
     * @description 首页
     * @author xiaomianyang
     * @date 2019-07-08 12:13
     * @param []
     * @return java.lang.String
     */
    @GetMapping("index")
    public String index(){
        return "index";
    }
}
HtmlController 用来渲染websocket页面
package com.apgblogs.springbootstudy.controller;

import org.springframework.stereotype.Controller;
import org.springframework.web.bind.annotation.GetMapping;
import org.springframework.web.bind.annotation.RequestMapping;

/**
 * @author xiaomianyang
 * @description
 * @date 2019-07-08 10:25
 */
@Controller
@RequestMapping("html")
public class HtmlController {


    /**
     * @description websocket页面
     * @author xiaomianyang
     * @date 2019-07-08 10:26
     * @param []
     * @return java.lang.String
     */
    @GetMapping("websocket")
    public String getWebSocketHtml(){
        return "webSocket";
    }

}
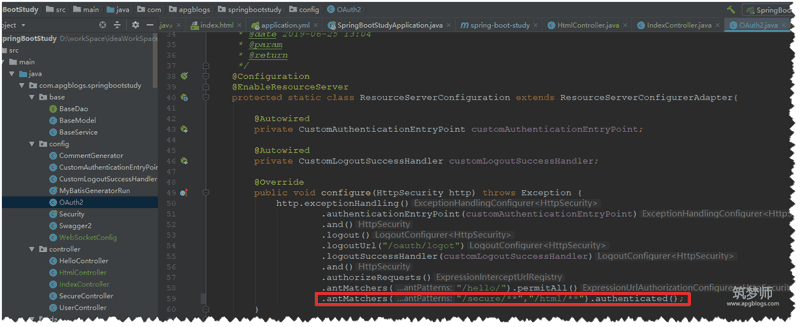
5、修改OAuth2文件
将html地址加入到需授权列表中,也就是我们access_token需要授权才可以访问,当然也可以不授权,这样做主要也是为了演示下token在前端获取和携带的流程

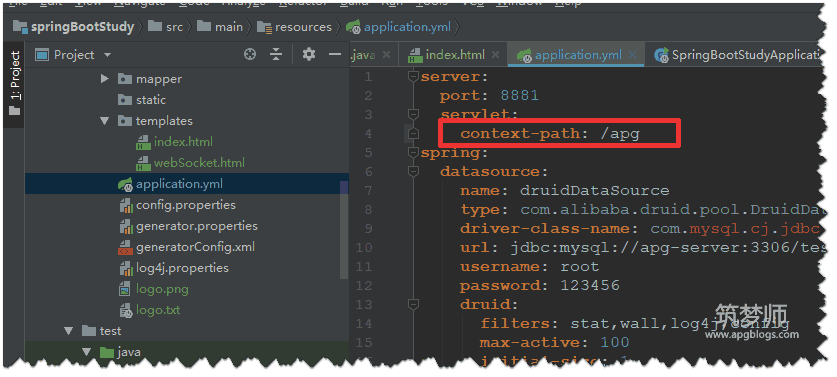
6、修改配置文件,将项目访问路径改为apg
之前是first,感觉不爽所以改了

7、新建两个静态页面,index.html和webSocket.html
在resources>templates目录下新建两个html文件
代码是vue的,如果不了解vue可以补一下,vue还是很好用的,ui是elementUi,网上都可以找到官网
index.html
就一个按钮用来获取令牌
需要注意的是,js用的es6的语法,需要在idea启用js es6的支持,可以度娘以下,设置很简单
<!DOCTYPE html>
<html lang="en">
<head>
    <meta charset="UTF-8">
    <title>首页</title>
    <link rel="stylesheet" href="https://unpkg.com/element-ui/lib/theme-chalk/index.css">
</head>
<body>
<div id="app">
    <el-input v-model="accessTokenVal" placeholder="accessToken"></el-input>
    <el-button @click="getAccessToken" type="primary">获取accessToken</el-button>
</div>
</body>
<!-- import Vue before Element -->
<script src="https://unpkg.com/vue/dist/vue.js"></script>
<!-- import JavaScript -->
<script src="https://unpkg.com/element-ui/lib/index.js"></script>
<script src="https://unpkg.com/axios/dist/axios.min.js"></script>
<script>
    axios.defaults.baseURL = "http://localhost:8881/apg";
    axios.defaults.headers['Content-Type'] = 'application/json';
    new Vue({
        el: '#app',
        data: function () {
            return {
                accessTokenVal: ''
            }
        },
        methods: {
            getAccessToken() {
                axios({
                    method: 'post',
                    url: '/oauth/token?username=admin&password=admin&grant_type=password',
                    auth: {
                        username: 'apg',
                        password: 'apg_secret'
                    }
                }).then(response => {
                    this.accessTokenVal=response.data.access_token
                }).catch(error => {
                    console.log(error)
                }).finally(() => {
                })
            }
        },
        mounted() {
        }
    })
</script>
</html>
webSocket.html
用来websocket通信的测试
<!DOCTYPE html>
<html lang="en">
<head>
    <meta charset="UTF-8">
    <title>webSocket</title>
    <link rel="stylesheet" href="https://unpkg.com/element-ui/lib/theme-chalk/index.css">
</head>
<body>
<div id="app">
    <el-container>
        <el-row style="width:100%">
            <el-col :span="4">
                <el-input placeholder="请输入消息内容" v-model="msgData"></el-input>
            </el-col>
            <el-col :span="4">
                <el-button @click="sendMessage" type="primary" style="margin-left:10px;">发送</el-button>
                <el-button @click="openConnect">连接</el-button>
                <el-button @click="closeConnect">关闭连接</el-button>
            </el-col>
            <el-col :span="16">
                <el-input
                        type="textarea"
                        :autosize="{ minRows: 2, maxRows: 10}"
                        placeholder="连接日志"
                        v-model="logData">
                </el-input>
            </el-col>
        </el-row>
    </el-container>
</div>
</body>
<!-- import Vue before Element -->
<script src="https://unpkg.com/vue/dist/vue.js"></script>
<!-- import JavaScript -->
<script src="https://unpkg.com/element-ui/lib/index.js"></script>
<script src="https://unpkg.com/axios/dist/axios.min.js"></script>
<script>
    axios.defaults.baseURL = "http://localhost:8881/apg";
    axios.defaults.headers['Content-Type'] = 'application/json';
    new Vue({
        el: '#app',
        data: function () {
            return {
                webSocket: null,
                logData: '',
                msgData: ''
            }
        },
        methods: {
            sendMessage() {
                this.webSocket.send(this.msgData)
            },
            closeConnect() {
                this.webSocket.close()
                this.webSocket = null
            },
            openConnect(){
                if(this.webSocket !== null){
                    this.$message.error('请先关闭webSocket连接');
                    return
                }
                if(!'WebSocket' in window){
                    this.$message.error('该浏览器不支持webSocket');
                }else{
                    this.webSocket = new WebSocket("ws://localhost:8881/apg/ws")
                }
            }
        },
        mounted () {
            that = this
            this.openConnect()
            this.webSocket.onopen = function(event){
                that.logData+="连接成功\n"
            }
            this.webSocket.onerror = function(){
                that.logData+="连接错误\n"
            }
            this.webSocket.onclose = function(){
                that.logData+="连接关闭\n"
            }
            // 窗口关闭时关闭连接
            window.onBeforeunload = function () {
                that.webSocket.close()
            }
            this.webSocket.onmessage = function(event){
                that.logData+=event.data+"\n"
            }
        }
    })
</script>
</html>
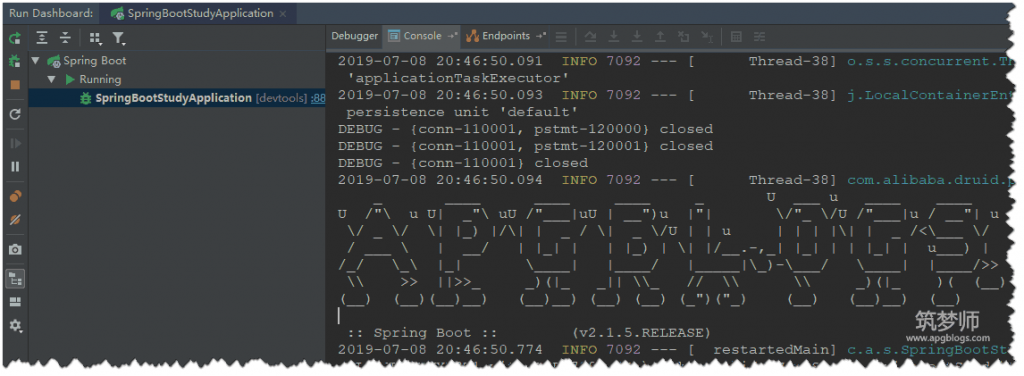
8、启动项目并获取access_token

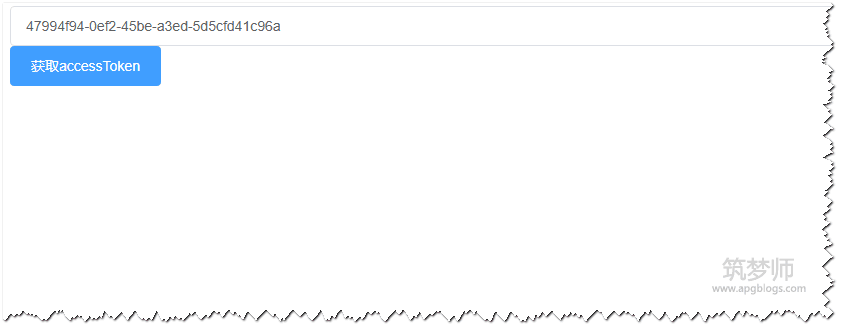
在浏览器中输入以下地址:http://localhost:8881/apg/index 访问index页面
点击按钮获取,复制文本框里面token,我的跟你的肯定是不一样的

9、拿到access_token后访问websocket页面
访问以下地址:http://localhost:8881/apg/html/websocket?access_token=47994f94-0ef2-45be-a3ed-5d5cfd41c96a
access_token 的值就是刚刚复制的

输入好嗨哟!发送测试,输入宝宝,我爱你测试

后端写的代码是群发的,所以将当前页面多开几个就能看到消息同步显示了,这里可以自己测试一下
10、文章源码地址
码云:https://gitee.com/apgblogs/springBootStudy/tree/websocket/
现在websocket就已经集成进去了,实现了跟服务端实时消息通信的需求,要做消息提醒或者在线聊天是不是就很简单了呢?有任何疑问或者问题可以在评论区留言哦。